ALL-WEATHER BACKYARD PATH
Want to make the most of your backyard in any type of weather, just like Brett did? Read how he did it, how long it took and what he used to get these great results.
Where did you get your inspiration from?
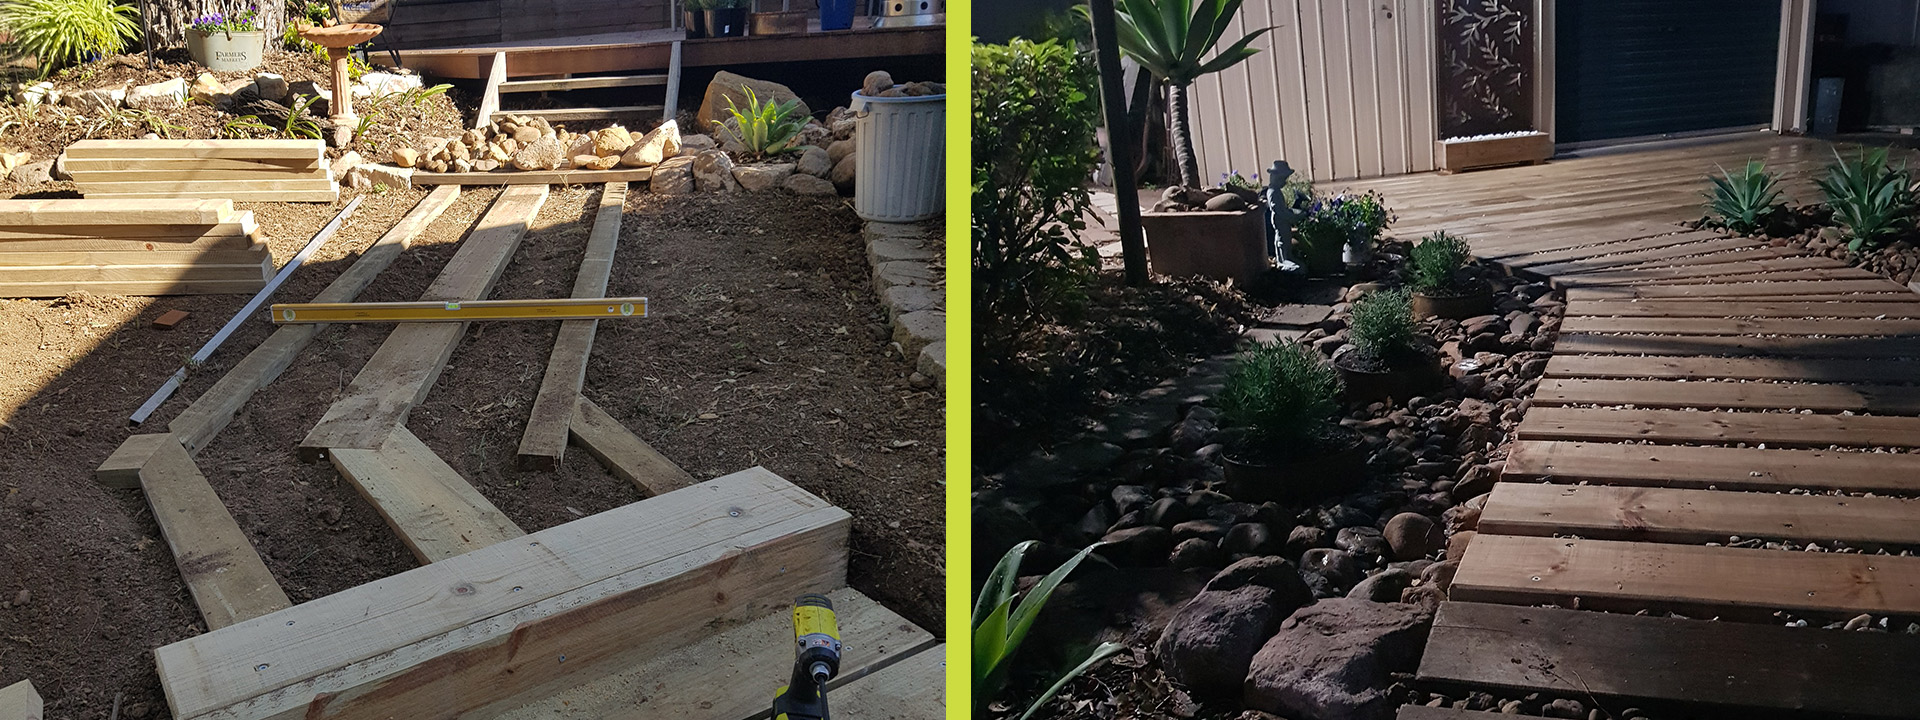
Several years ago, Tracey and I organised a builder to make us a large merbau deck with a small set of steps. We asked the builder to add a short sleeper path to enhance our garden. While helping him, I realised how easy sleeper paths can be to make and how good they can look. Since then, we have completed several projects with sleepers. On this occasion, we wanted to continue the flow from the deck down to the mancave and create a larger multi-purpose area for entertaining.
How long did it take to complete?
From lifting the first paver to final wet down (including a trip to Bunnings each day for a load of sleepers), it took 5 days.
![]()
![]()
What skill level will I need to complete it?
Anyone with patience, a good imagination and basic tool knowledge could tackle this kind of project. The key tips are planning and motivation – know what you want to achieve and get into it! Not every job runs smoothly, but if you take the time to stop and think about how to solve the problem, everything will be fine. The best part of the job is sitting back with a beverage and checking out your work, saying: “we built that, cheers"
What was your budget?
We didn’t really have a set budget, total cost of the project came to around $1300, the majority being the sleepers.
What materials did you use? Alternatives?
We used 200mm x 50mm treated pine sleepers (mainly 3m lengths cut to size for the deck and rails, and some 2.4m lengths cut in half for the 1200mm-wide path). We prefer the pine for its ease of handling and looks, but properly treated hardwood could also be used.
- 100mm batten screws (almost used a full tub of 500)
- 3 x rusty looking tree rings
- 3 x lavender plants
- 1800mm x 900mm screen panel
- 1 bag of decorative white pebbles for the screen panel base box
- River rocks methodically scavenged by Tracey from throughout our gardens
- Decorative gravel for infill between sleepers
What tools did you use?
- RYOBI ONE+ Drill Driver
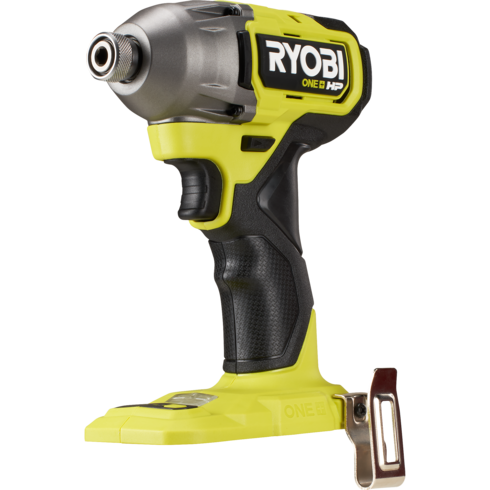
- RYOBI ONE+ Impact Driver
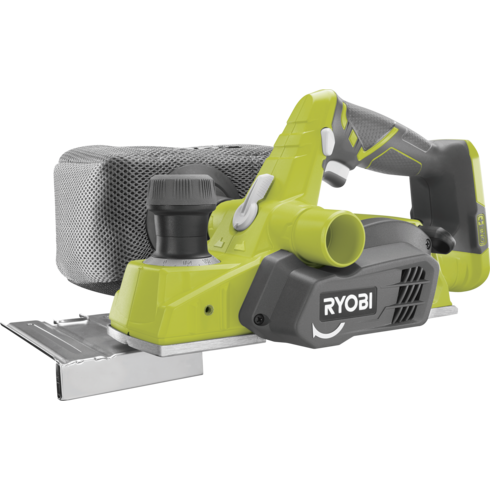
- RYOBI ONE+ Planer
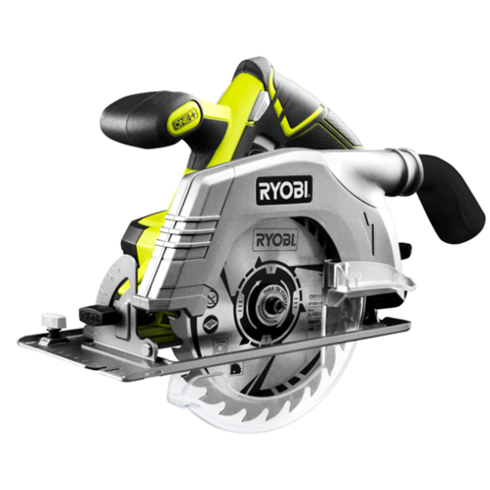
- RYOBI ONE+ Circular Saw
- RYOBI Workshop Blower (for sawdust clean-up)
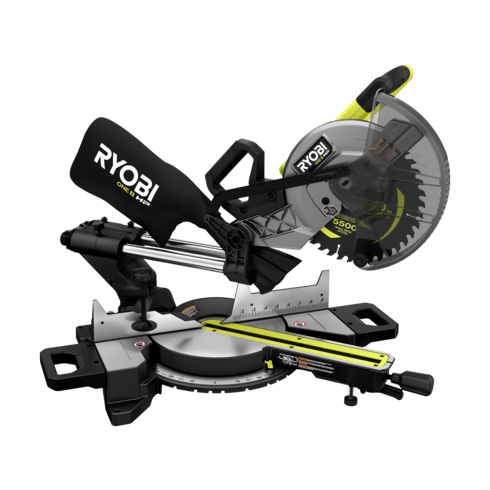
- Sliding Compound Mitre Saw
What was the toughest part of the project where extra care or attention to detail was required?
The toughest part was definitely removing the dirt to be able to set in the rails at the required level.
Also, working out the rail position and the angles for the curve in the path to some extra effort.
![]()
![]()
What would be the easiest way to modify your design to suit my space (can I make it bigger, smaller, easier, cheaper, textures, colours, materials) – if appropriate?
Due to the large deck area (6m at the longest point) I used full-width sleepers as rails spaced approximately 800mm apart so I could stagger and anchor the deck boards more easily. For a smaller area, let's say 3m or under, you would only need half-width rails (achieved by ripping a sleeper lengthways down the middle with a circular saw or a table saw.
TIP: Use your sleeper offcuts to slap together some planter boxes, shelves, or anything you like.
![]()
Featured Products
-
star_outlineAdd to My Wishlist18V ONE+ Drill Driver - Tool OnlyRDD18★ ★ ★ ★ ★ ★ ★ ★ ★ ★ (3)
$99
-
star_outlineAdd to My Wishlist18V ONE+ HP™ Brushless 4 Mode Impact Driver - Tool OnlyRID18X★ ★ ★ ★ ★ ★ ★ ★ ★ ★ (51)
$275
-
star_outlineAdd to My Wishlist18V ONE+ 82mm Planer - Tool OnlyR18PL-0★ ★ ★ ★ ★ ★ ★ ★ ★ ★ (70)
$218
-
star_outlineAdd to My Wishlist18V ONE+ 165mm Circular Saw - Tool OnlyR18CS-0★ ★ ★ ★ ★ ★ ★ ★ ★ ★ (213)
$178
-
star_outlineAdd to My Wishlist
 18V ONE+ Workshop Blower - Tool OnlyR18TB-0★ ★ ★ ★ ★ ★ ★ ★ ★ ★ (297)
$116
-
star_outlineAdd to My Wishlist18V ONE+ HP™ Brushless 254mm Sliding Mitre Saw – Tool OnlyR18MS254X★ ★ ★ ★ ★ ★ ★ ★ ★ ★ (2)
$599