


.png?w=100&itok=Md9-7E8t)


%20(2).png?w=100&itok=fEHREjki)
_ANZ-Group-shot_v2.png?w=100&itok=Z_Qi2FlQ)
_ANZ-Group-shot.png?w=100&itok=k25pq8iJ)
_ANZ-Group-shots.png?w=100&itok=v6A67Pxg)


Drill into timber, soft metal and hard materials including brick and concrete with the RYOBI 18V ONE+ Hammer Drill.

By Kerryn Carter
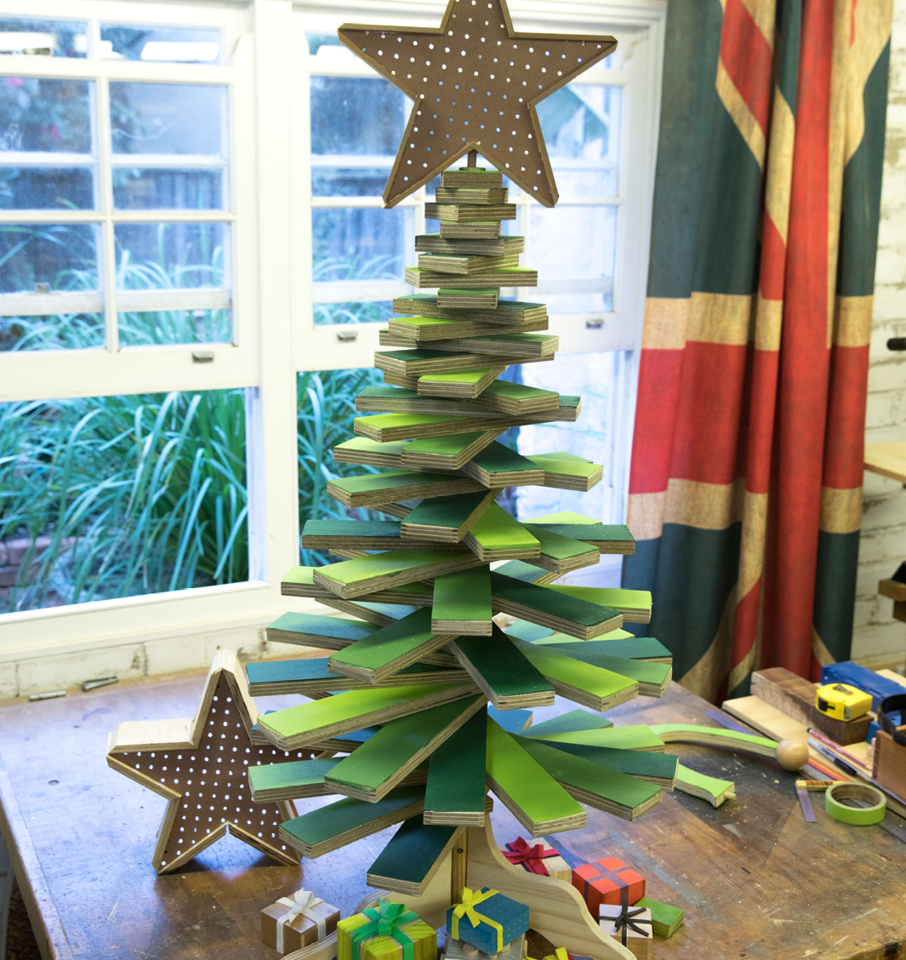
Check out this step-by-step guide to making your own Christmas tree. Download the tool list, materials list and printable templates for this project.
Difficult: Advanced
Category: Holiday Project
Rulers
Pencils
Clamps
Limbs:
19mm dressed pined (64mm x 15m)
30mm spade bit
Green paint (we used 3 shades)
Trunk:
Clear pine dowel (30mm x 1m)
19mm clear pine board (184mm x 1.8m)
6 x wood screws (8g x 50mm)
Countersink bit (optional)
5mm drill bit (through hole)
3.5mm drill bit (pilot hole)
Shining star (optional):
6mm drill bit
Dowel (6mm x 50mm)

On a large piece of paper, mark up the length of your tree trunk (950mm). This will help later when you line up your limbs prior to assembly.

From the Limb Cut List (pg.7 of PDF), measure how long each tree limb will need to be and mark up the lengths on the wood using a pencil.
You’ll also need to cut out an additional piece (65mm x 64mm) as this will act as the grommet, giving your first tree limb something to rest on.
TIP: As you mark up the lengths, number them as you go so you can easily identify which order they’re placed in to form the tree.

Clamp down wood to stable and secure surface. Using your Ryobi ONE+ Jigsaw cut each piece along your pencil line.
TIP: Always ensure you’re cutting away from yourself. If the angle becomes awkward, adjust your workpiece to suit you, not the other way around.

To make 100% sure you’ve got all of your pieces, line them up in order against the piece of paper you marked up in Step 1.
If when stacked they are smaller or longer than your trunk line, you will need to adjust the length of your tree trunk accordingly (make sure you also allow for the height of the legs, as these attach to the trunk).

Take your Ryobi ONE+ Palm Sander and smooth down the edges and corners to ensure there are no sharp edges.

Measure the halfway mark on each tree limb (including the grommet), and after clamping down your first piece, use a 30mm spade bit with your Ryobi ONE+ Drill Driver to drill a hole in the centre. Repeat process for the other tree limbs and grommet.

Using a small roller, paint the topsides of the tree limbs. We alternated between 3 shades of green, but the possibilities are endless!

For your tree’s trunk, cut 30mm clear pine dowel to 950mm (or the length you determined in Step 4) using the jigsaw – don’t forget to clamp down securely before cutting.

Every tree needs a base. To make the feet for your tree, use the stencil provided and mark onto 19mm plywood. Clamp down to a secure and stable surface & using your Ryobi ONE+ Jigsaw, follow your pencil line.

To get your tree trunk standing freely, you’ll need to attach each leg to the dowel with 2 screws.
Mark the dowel so no screw holes overlap.

Drill 6 through holes using a 5mm drill bit and your Ryobi ONE+ Drill Driver. Transfer the marks to the legs and drill 3.5mm pilot holes into each leg.

Screw the legs on with 8G x 50mm screws.

Slide the grommet on first and then each of the tree limbs in order from piece 2 to 42.

To complete your tree, try making a star out of wood you have left over and attach with a Ryobi ONE+ Glue Gun.
Or if you want to give your tree the extra special treatment, try making this Shining Star (left) to top it off!
See the “Shining Star” PDF for instructions.
To attach the star, using a 6mm drill bit and your Ryobi ONE+ Drill Driver, drill a 20mm deep hole into the centre of your 30mm dowel trunk. Insert a 50mm piece of 6mm dowel into the hole and place your star on top.
.png?w=100&itok=D7d8Umfz)

.png?w=100&itok=Lj7SSICT)

.png?w=100&itok=fnsLcLhG)


.png?w=100&itok=efvsqCNL)


.png?crop=yes&k=c&w=690&h=690&itok=2LvRkXnC)


