


.png?w=100&v=d5f9955a-145e-481e-8081-5ddf4d74c7cc&itok=hKuNtBOw)


.png?w=100&v=2695a42f-b099-4e31-bdbd-c1b445ff88c0&itok=Md9-7E8t)


%20(2).png?w=100&v=a9b7928b-cece-4e51-b913-62ae316129a9&itok=fEHREjki)
_ANZ-Group-shot_v2.png?w=100&v=f3a4afac-70ac-4758-8474-ff17fe163b1c&itok=Z_Qi2FlQ)
_ANZ-Group-shot.png?w=100&v=72a4a24c-7670-47f7-a68e-edeaafa41c8d&itok=k25pq8iJ)
_ANZ-Group-shots.png?w=100&v=4d5e1cd2-60a9-45da-bcfb-1b8500ccaea9&itok=v6A67Pxg)


Drill into timber, soft metal and hard materials including brick and concrete with the RYOBI 18V ONE+ Hammer Drill.

The installation of skirting boards in your home is usually one of the last steps in a renovation. It can tie a whole room together to deliver a first-class finish. But joining mitre cuts in skirting boards with profiles can often pose problems for DIYers. In this article, Jake O’Neill shows you have to get great-looking mitres ... with no gaps.
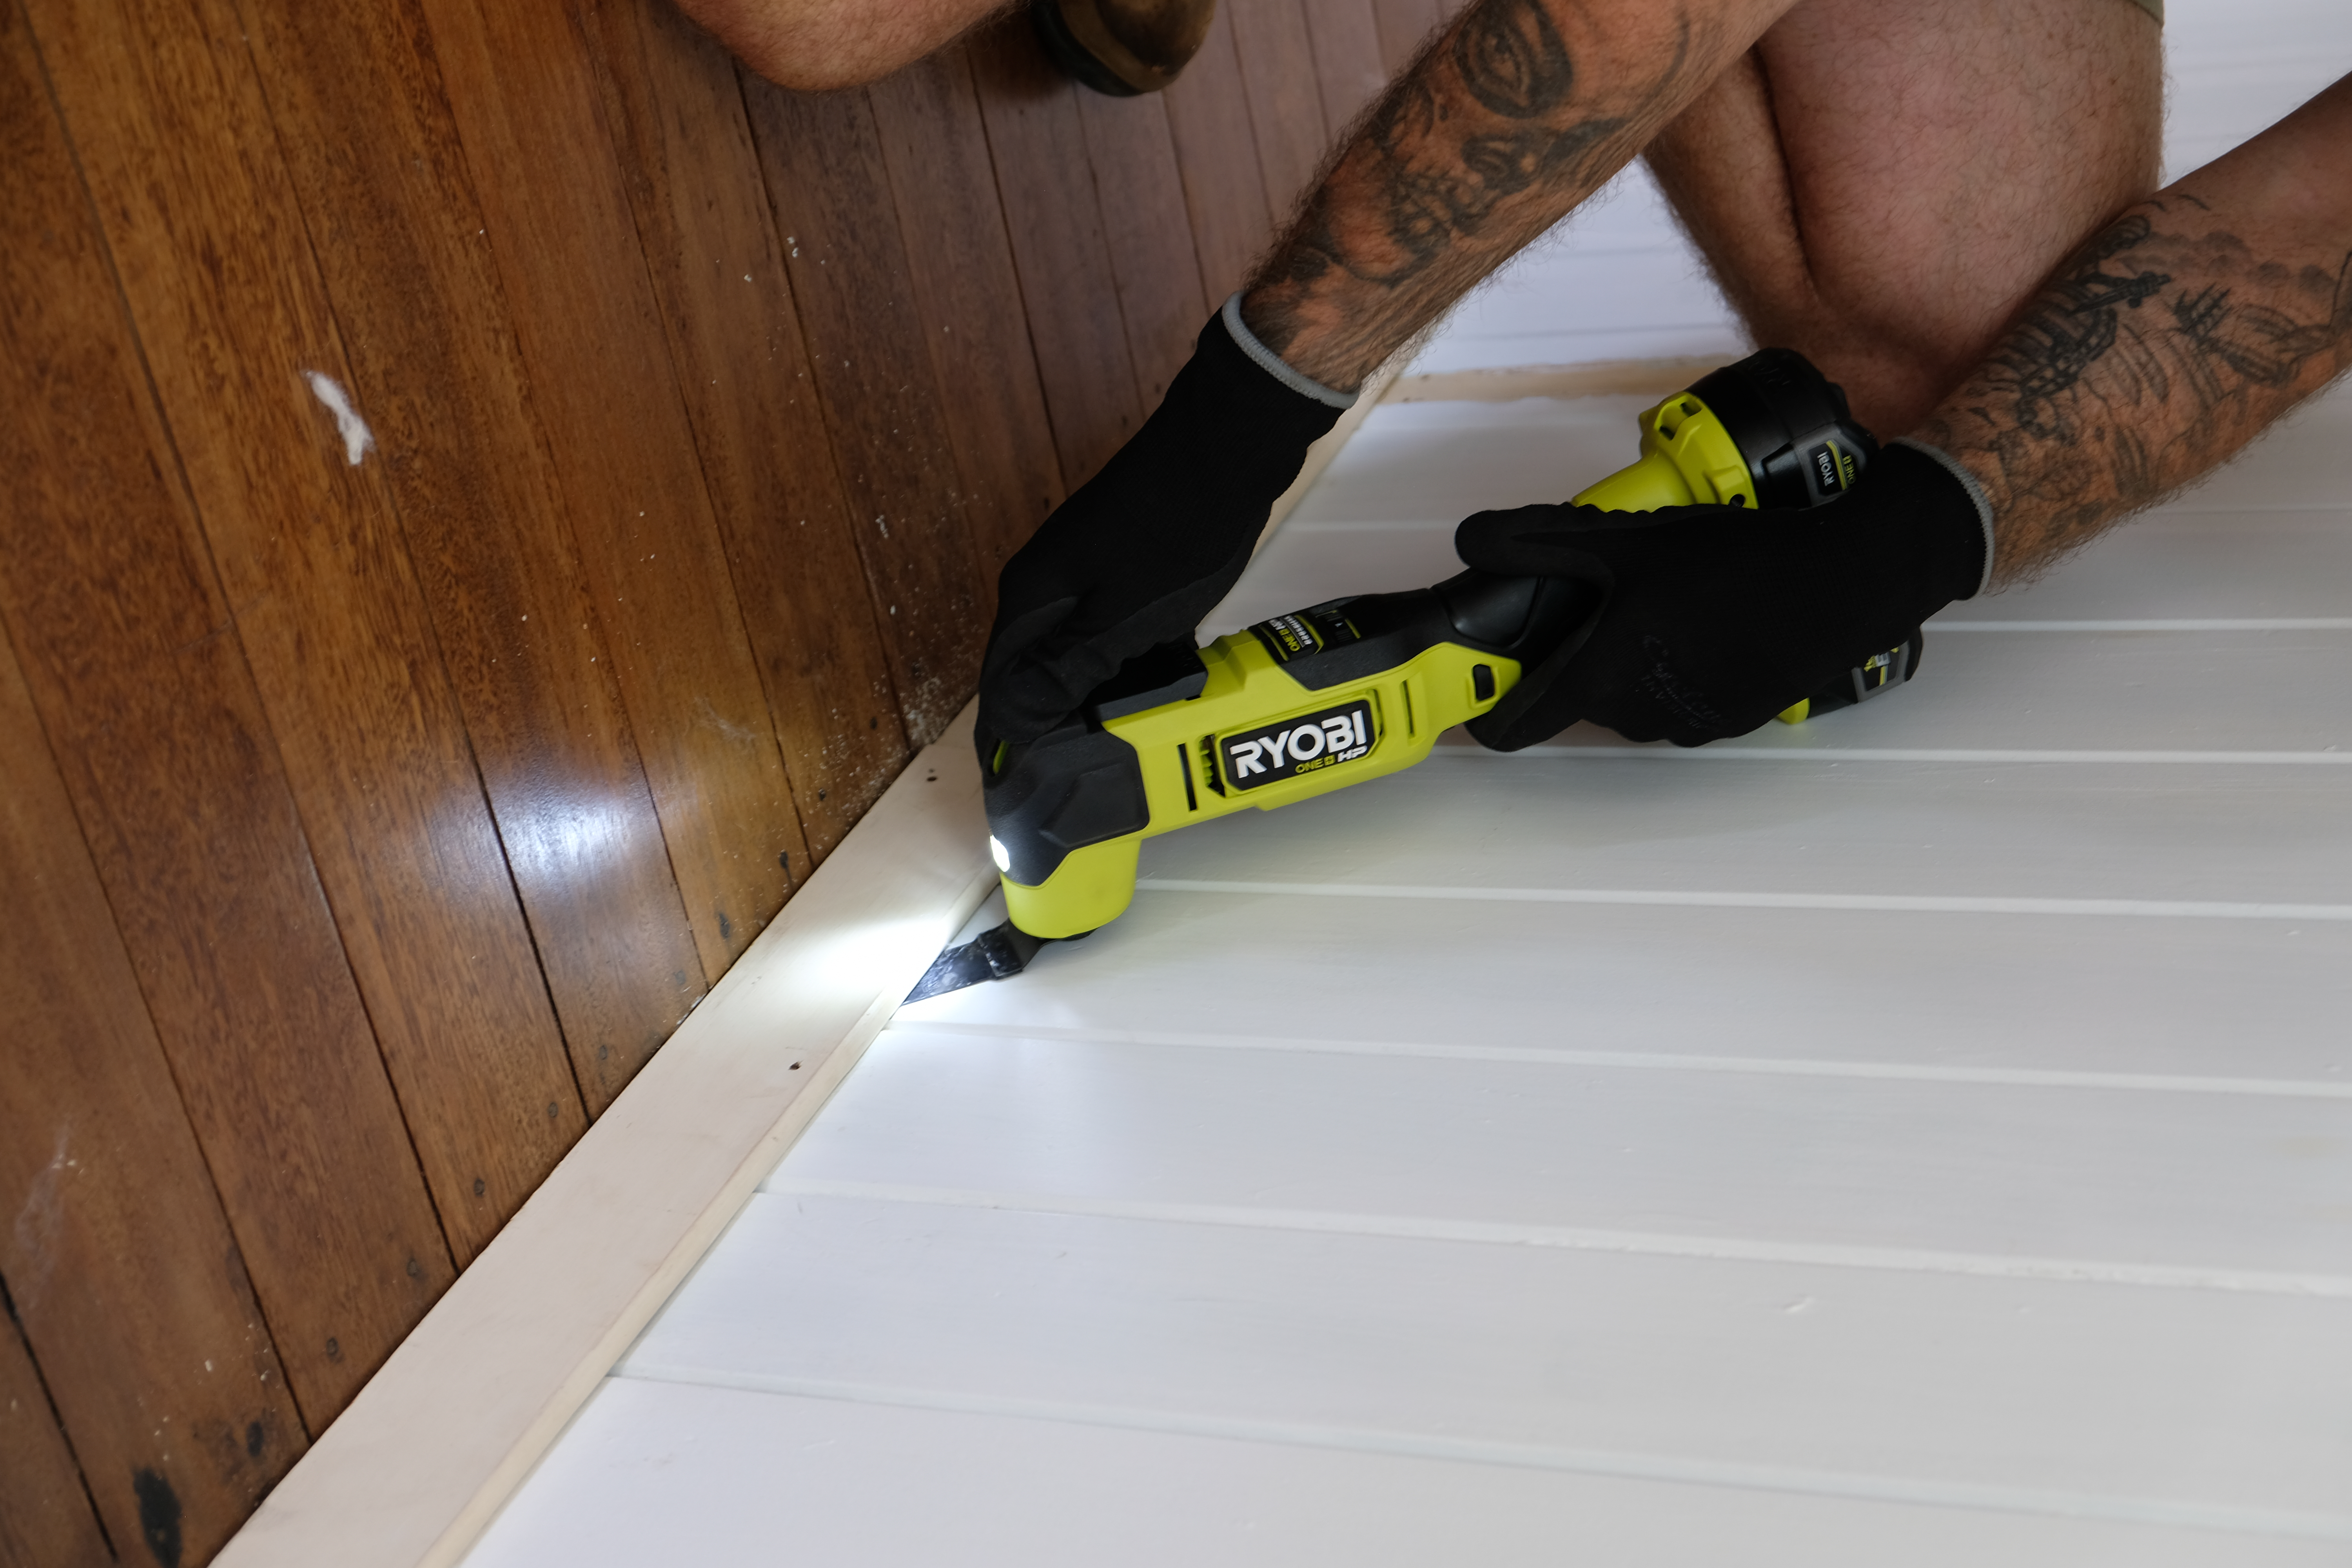
When removing old skirting boards, use either a hammer or a Multi Tool with a metal cutting blade to remove any hidden nails.
TIP: Be careful when prying old boards away from plasterboard as this can leave dents in the plaster. Place a scrap piece of timber between the hammer and the plasterboard.
Remove any debris, glue, nails, etc, left behind by the old boards. Clean surfaces to ensure new boards sit flat against the wall.
I found using the Multi Tool was the most efficient way of removing the old boards and residue on the wall.
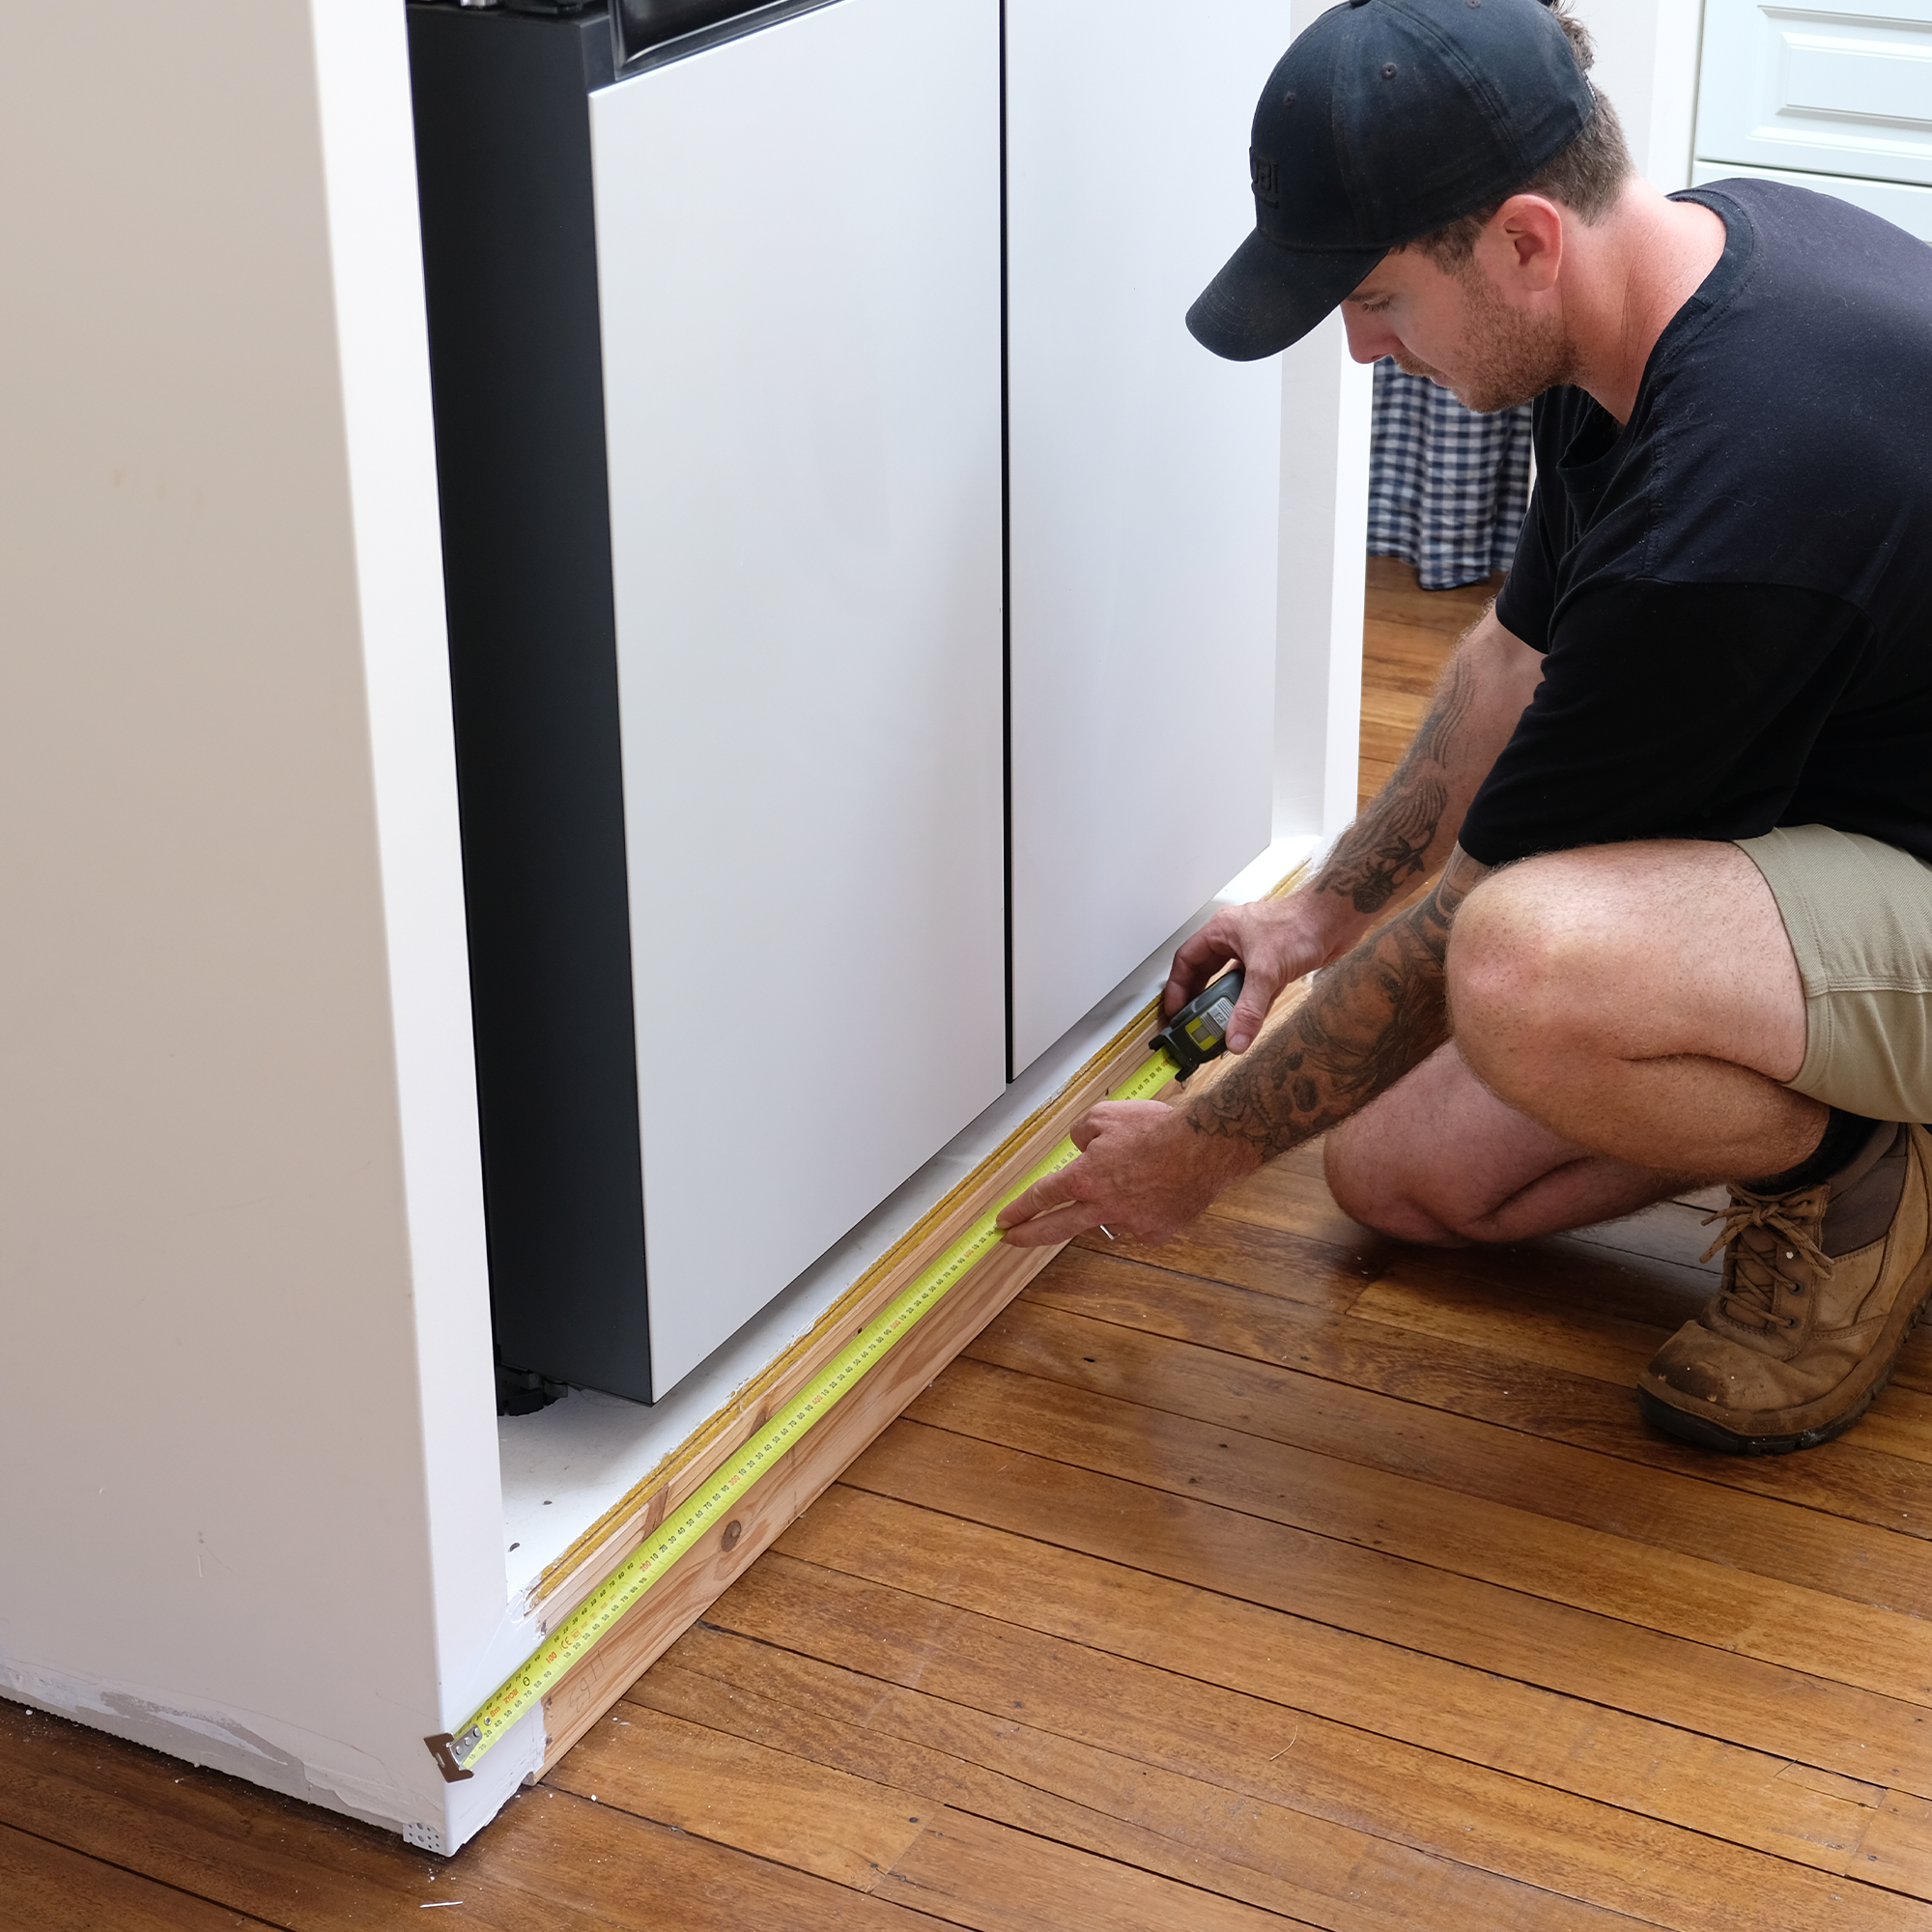
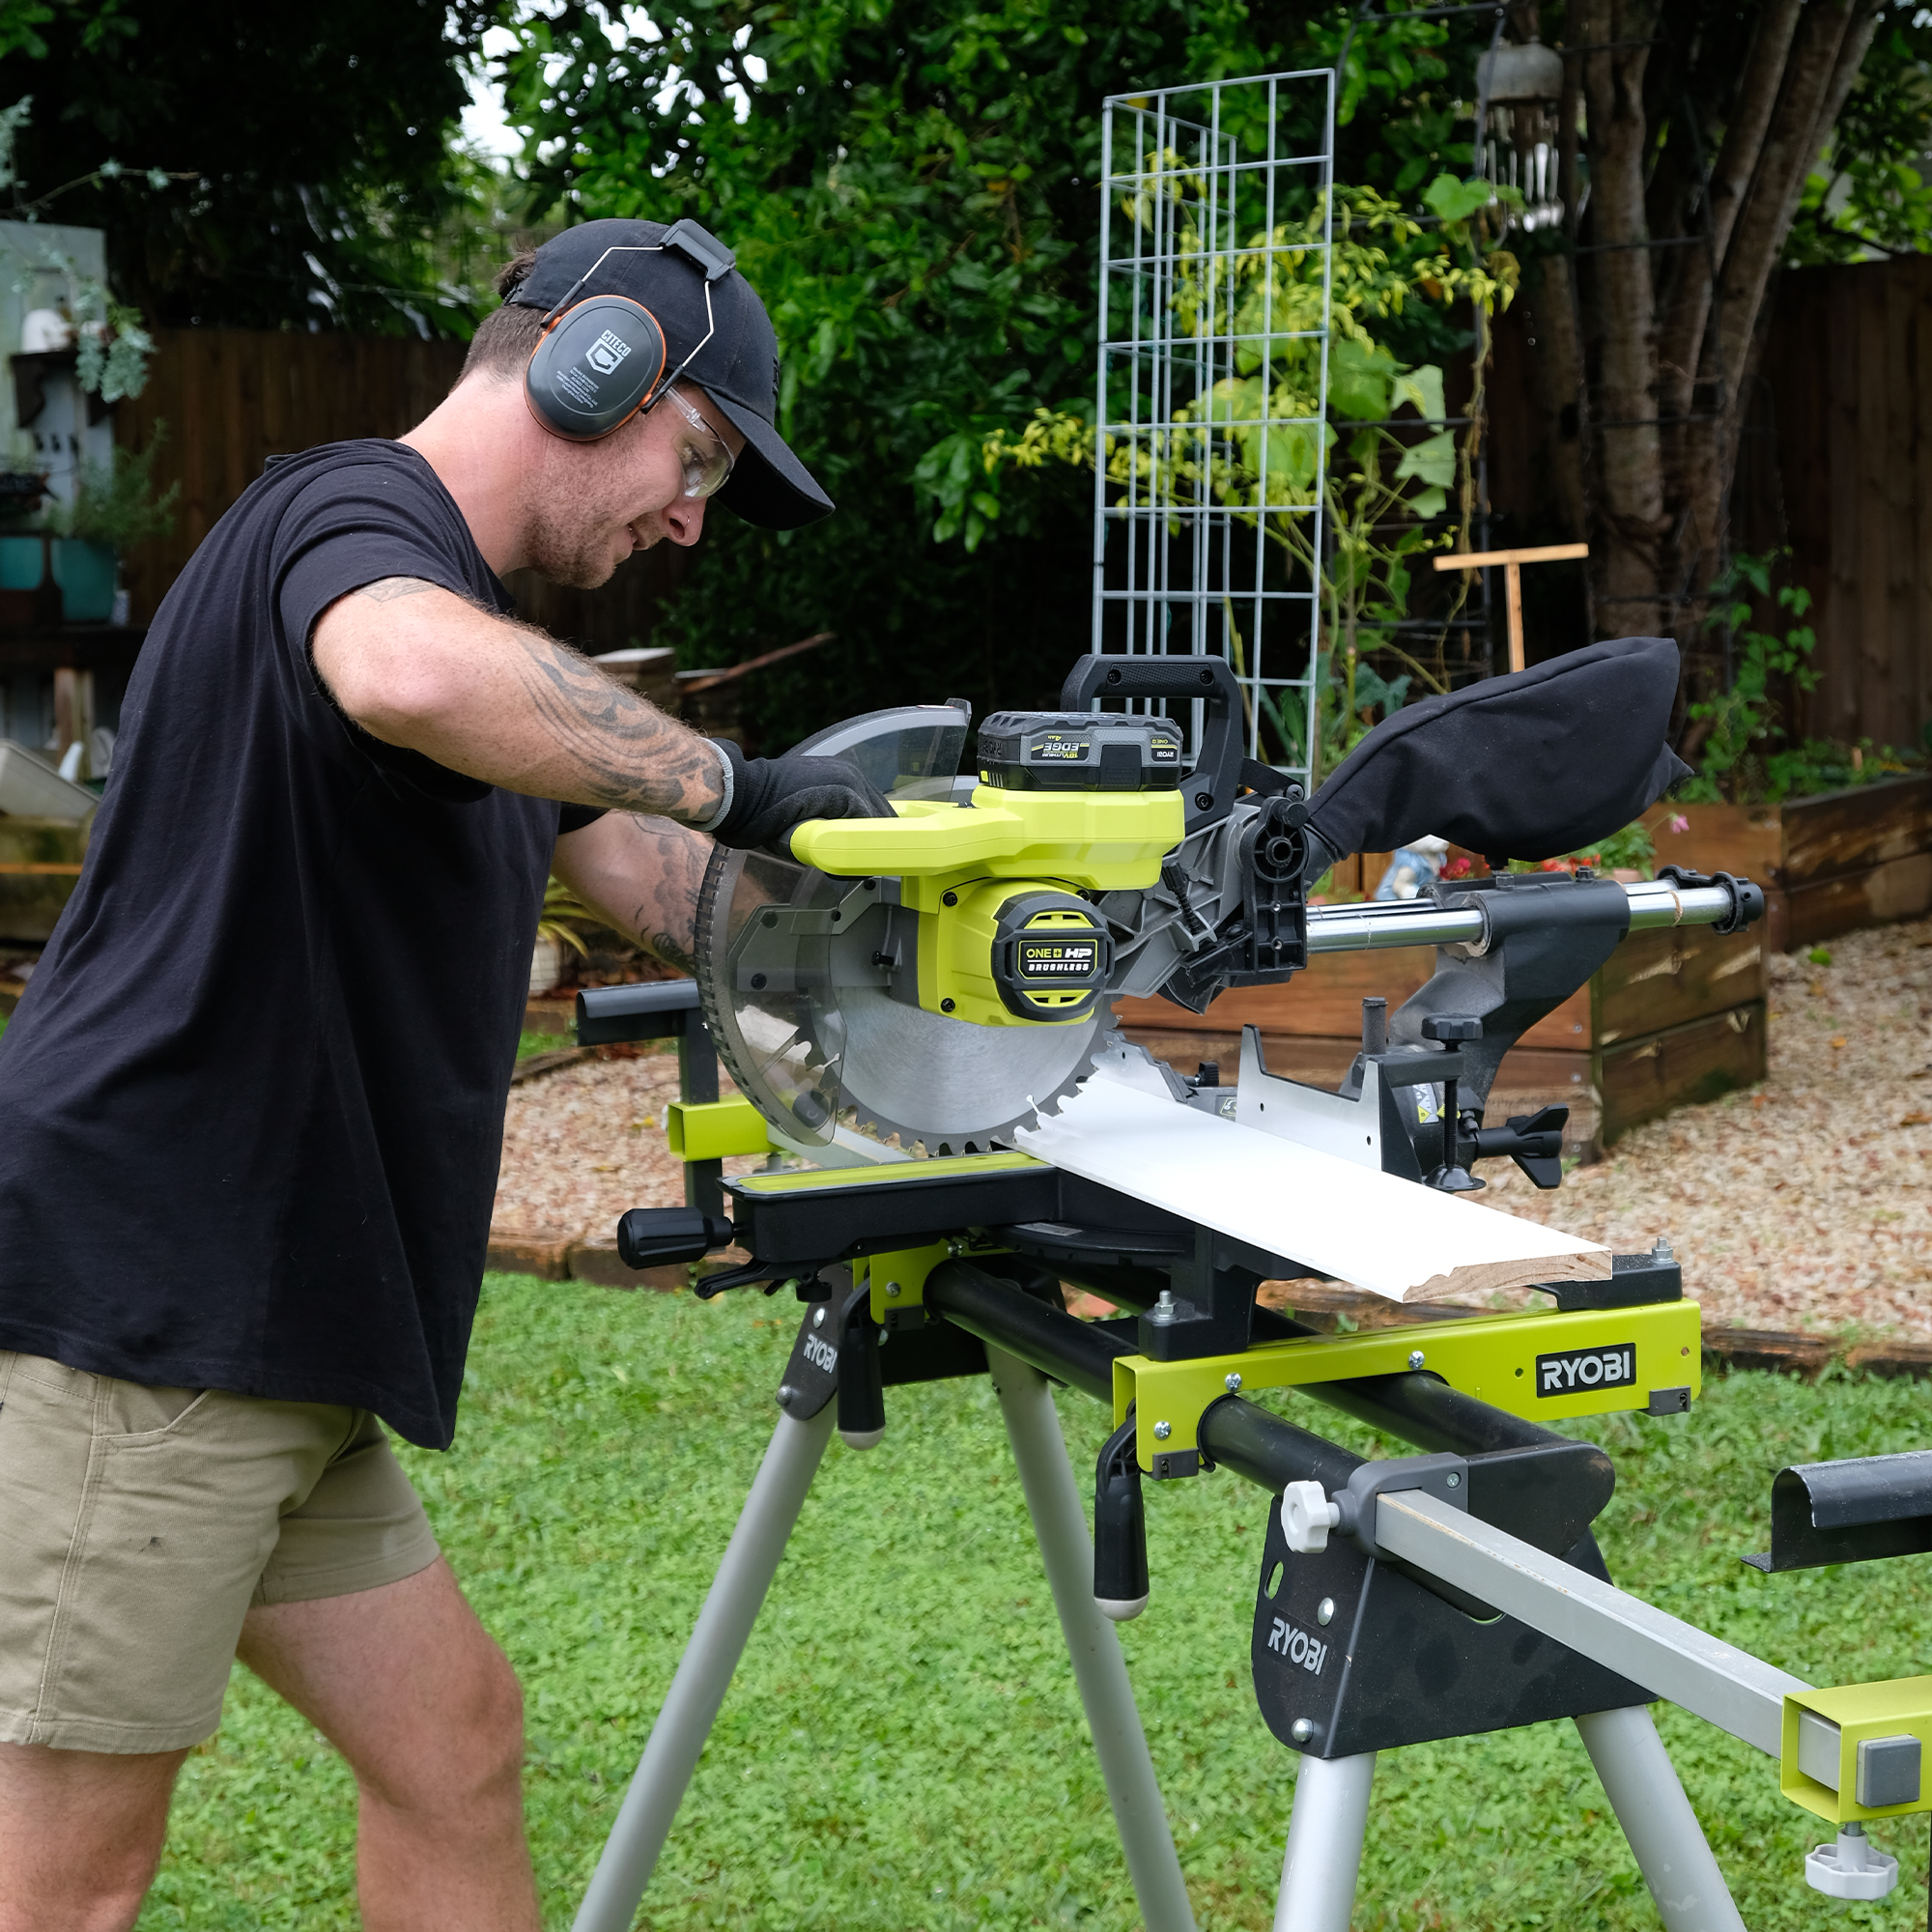
Measure each section of the wall where skirting boards will be installed and note down any joins that will need to be a mitre cut (external joins), straight cut or scribed (internal joins). Using a sliding mitre saw for accuracy, cut each section to length.
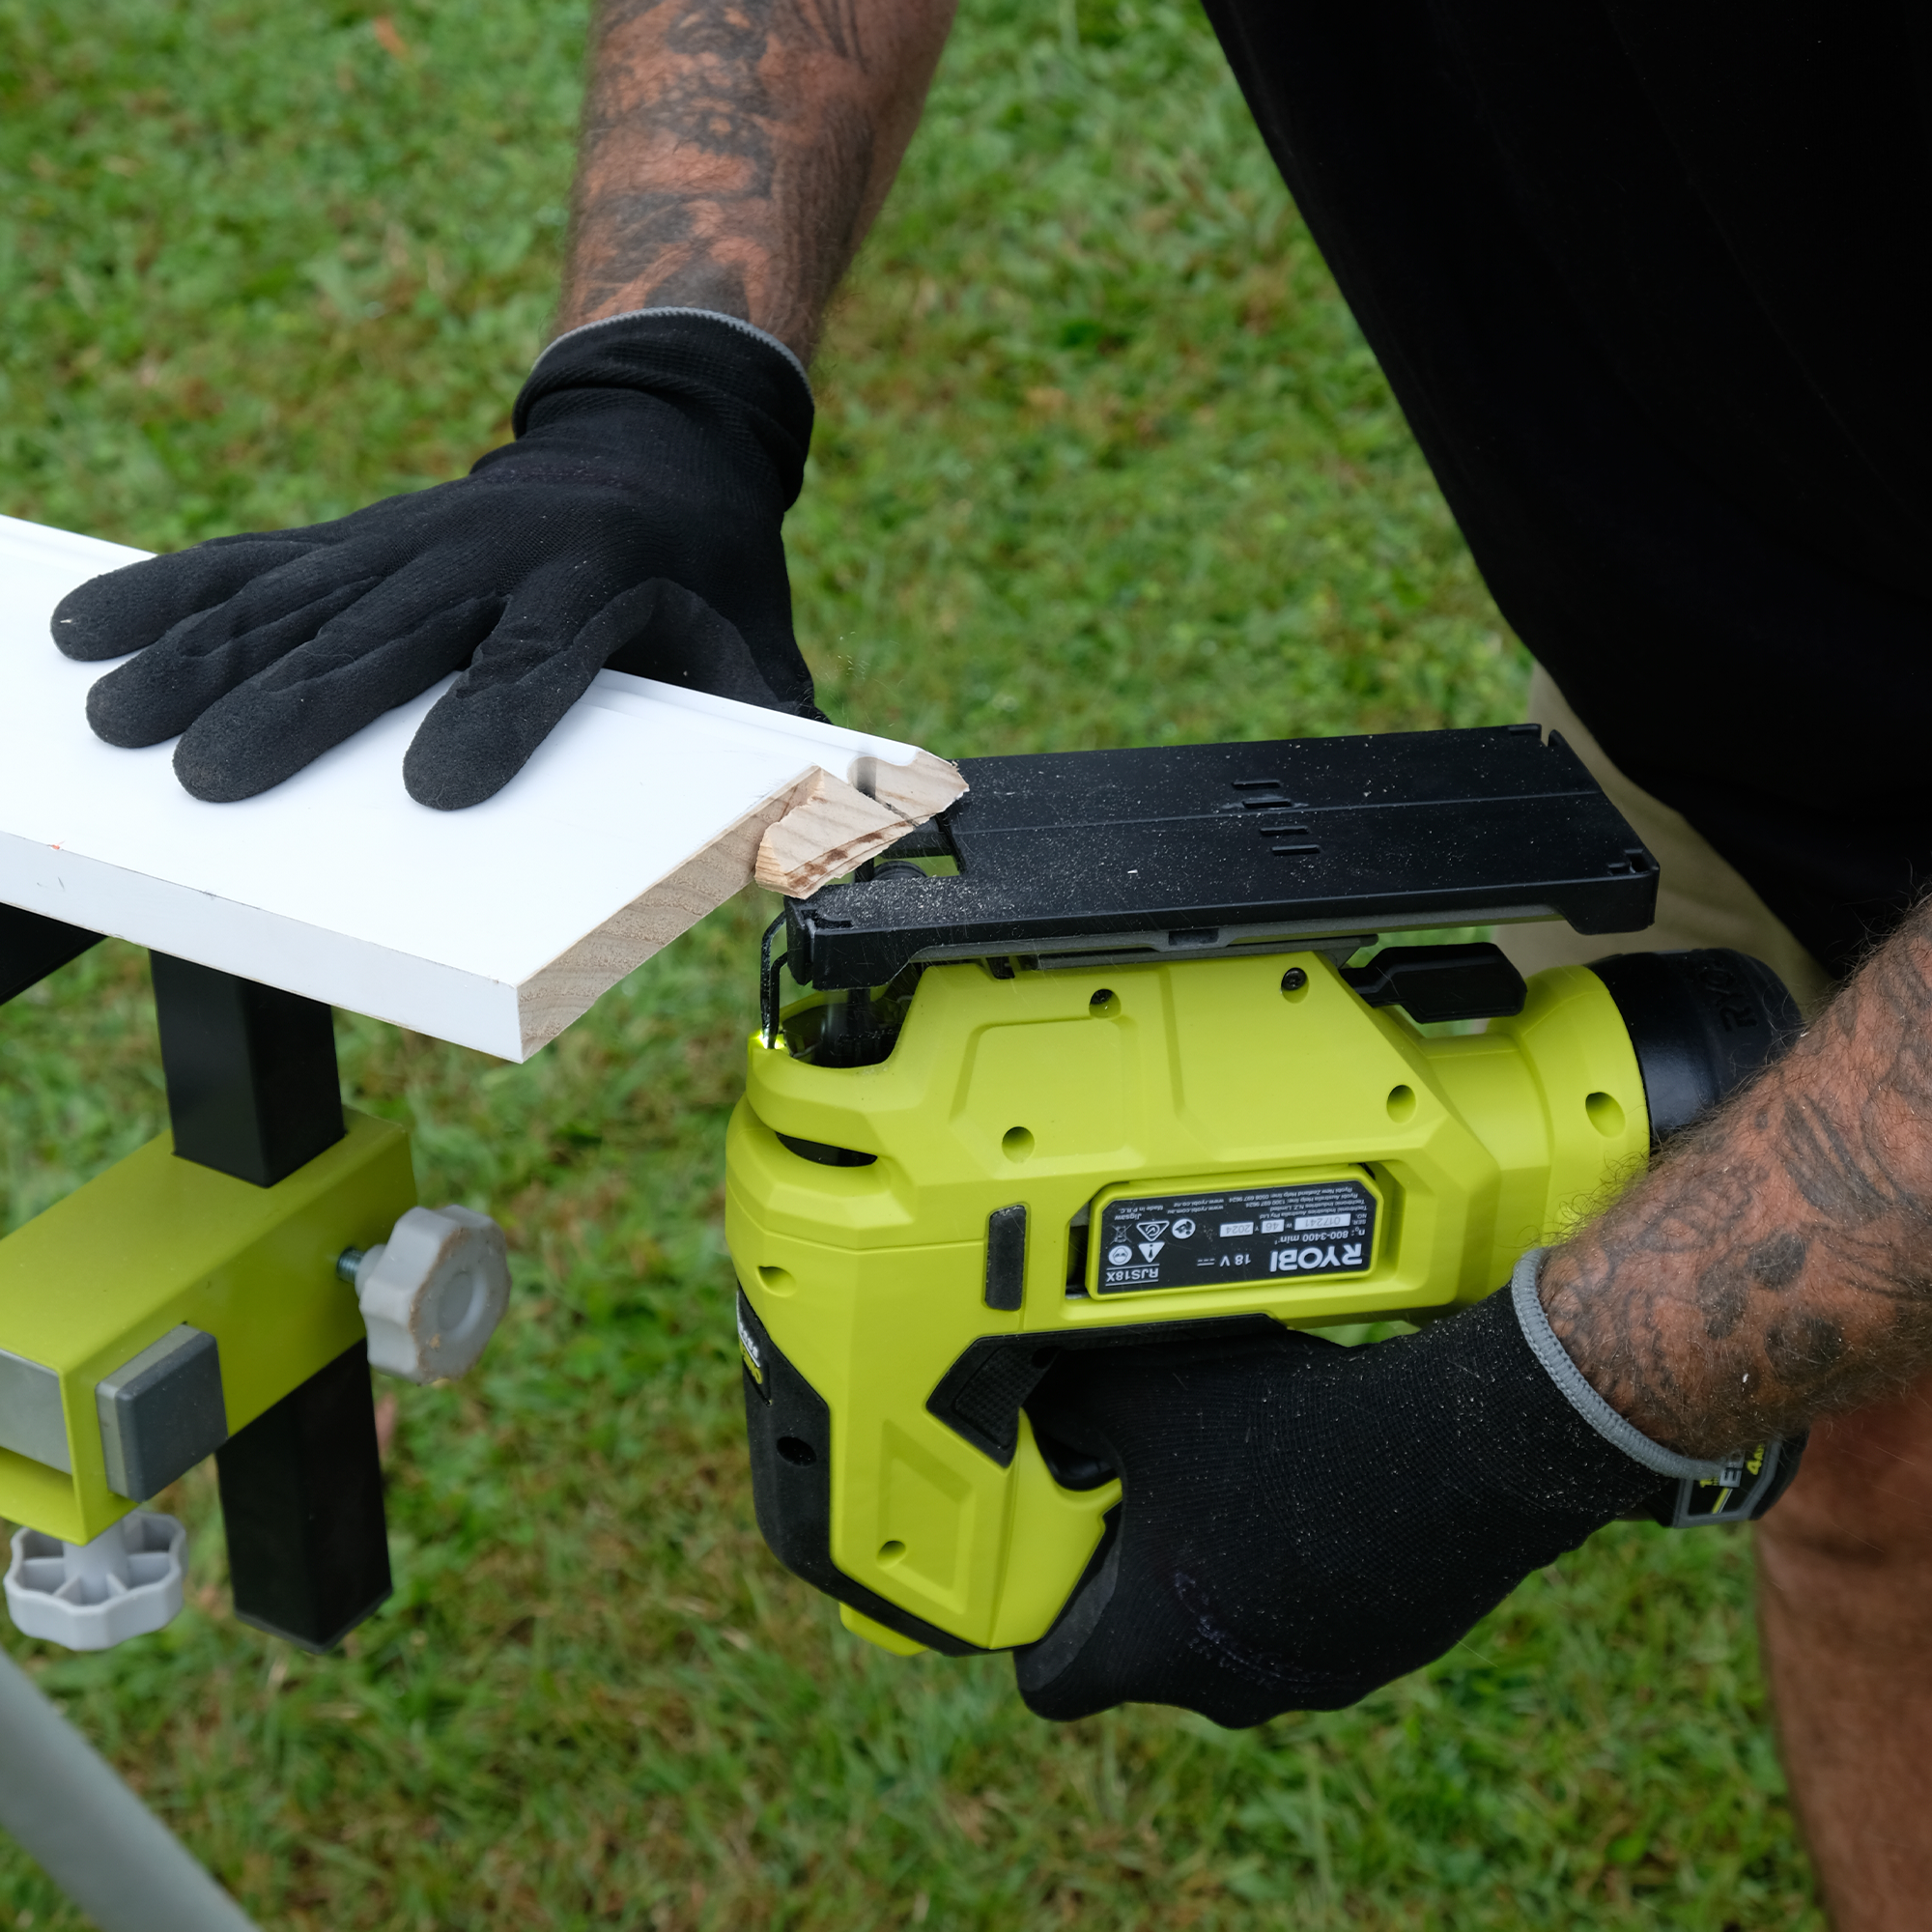
For the best result, scribe internal joins. With your two boards, cut your first board with a simple 90o cut and butt it up to the wall where it will be installed. With the second board, cut the end at a 45 o angle so that the raw timber is exposed when looking at the face of the board. Trace along the board’s profile with a pencil so it is clear where to scribe. Using either an angle grinder with a flap disk or a jigsaw with a fine scroll cut blade (or use a traditional coping saw), remove the excess material by following with boards profile with a slight back cut (see image).

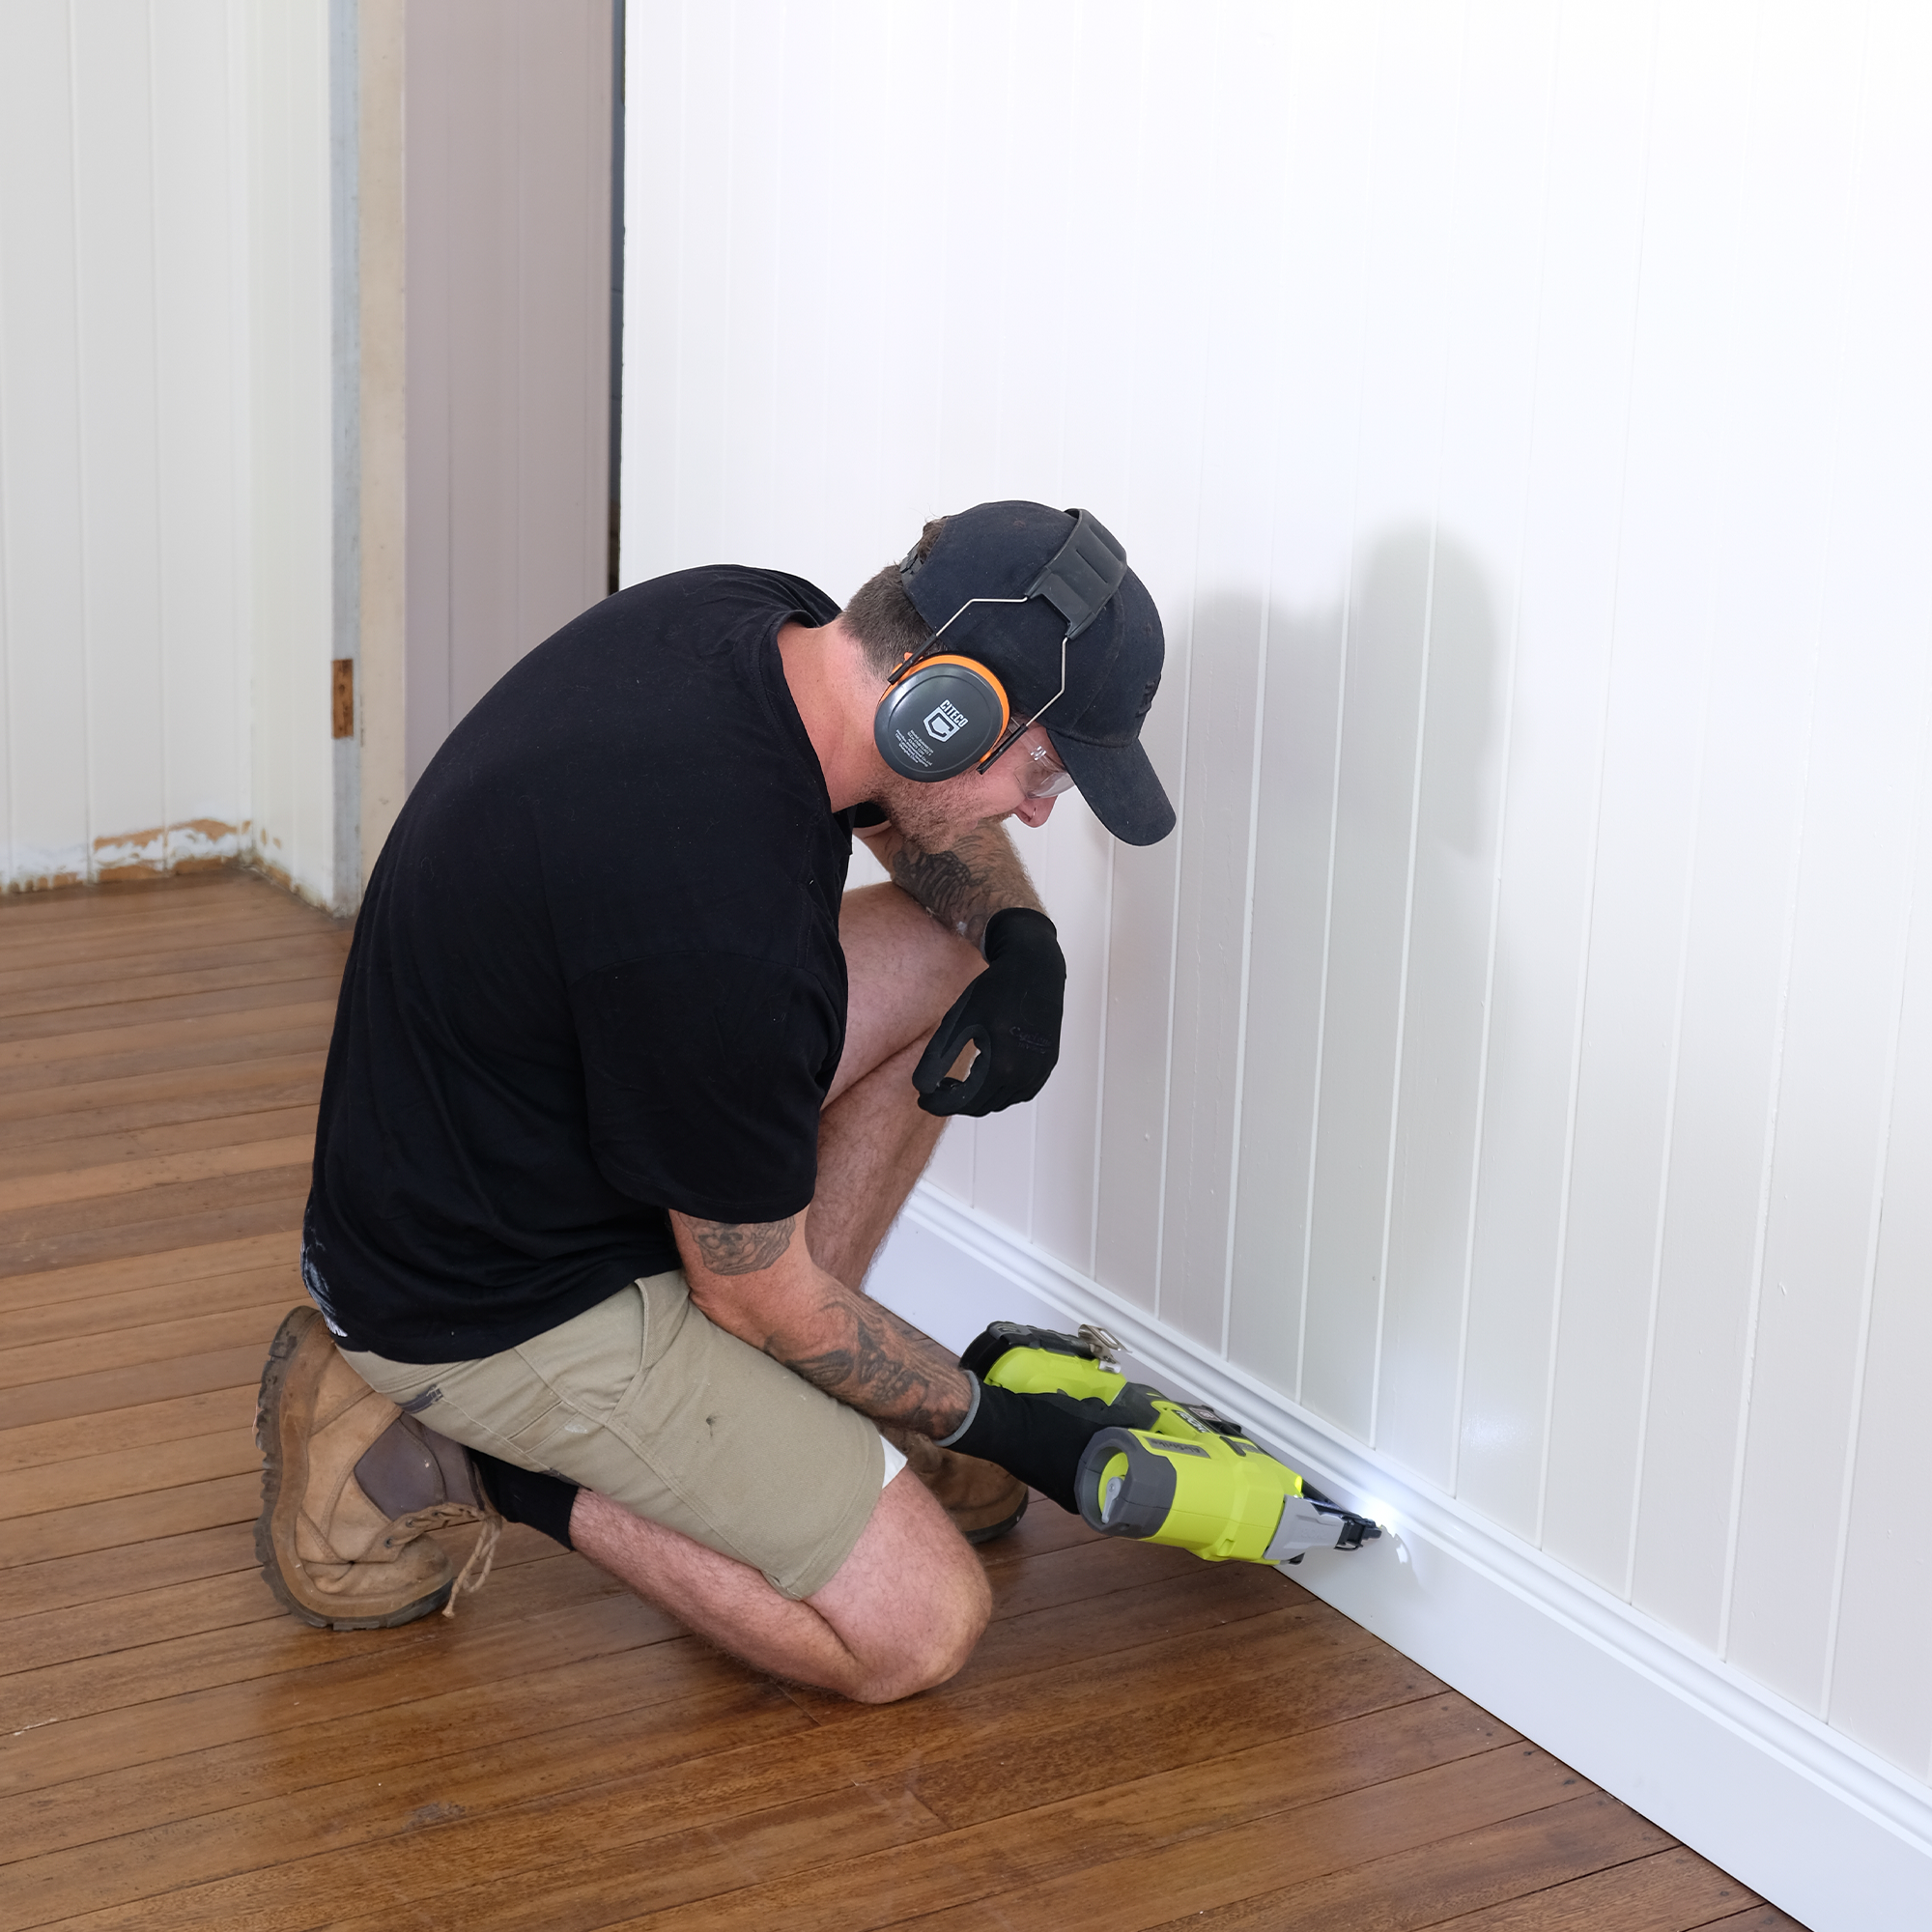
Starting at one corner of your room, fix the boards into place with brad nails and adhesive, following the contour of your floor. Apply adhesive to the mitre joins.
TIP: You may need to use a stud finder to locate the studs in your wall for the brad nails.
TIP: If laying laminate flooring, tiles or carpet in the future, make sure to leave a suitable gap under the skirting.
Fill nail holes with a wood filler, allow to dry and sand smooth. Paint your raw skirting boards with a suitable primer followed by two top coats. Apply gap filler to the top and to the joins for an overall great finish.

Feeling creative but lacking ideas? We’ve got you covered! Watch our videos and follow the step-by-step instructions to unleash your creativity.
.png?w=100&v=6c04e2a3-04b9-449c-97a0-86f8df82dcb1&itok=D7d8Umfz)

.png?w=100&v=07272864-2df4-45f0-aa93-568aa3920466&itok=Lj7SSICT)

.png?w=100&v=4297d0f7-8d6a-4632-bff2-7c593a97d3cb&itok=fnsLcLhG)


.png?w=100&v=6fe76245-ac4a-4aa3-986d-04347f143028&itok=dFif4A99)


.png?w=100&v=5053a26b-c336-46d9-b44e-ab91738f07c9&itok=efvsqCNL)


.jpg?crop=yes&k=c&w=690&h=690&v=4b26b44d-6833-4ed0-a56b-59e66399b310&itok=KXpv9Gt_)
.png?crop=yes&k=c&w=690&h=690&v=a4b63582-c396-4722-ac7f-d5c2d50b4b17&itok=gfFIhyAE)


.jpg?crop=yes&k=c&w=690&h=690&v=49dc01ac-5a59-462f-a71b-b7bf68d6570d&itok=Rykxbq4a)


